
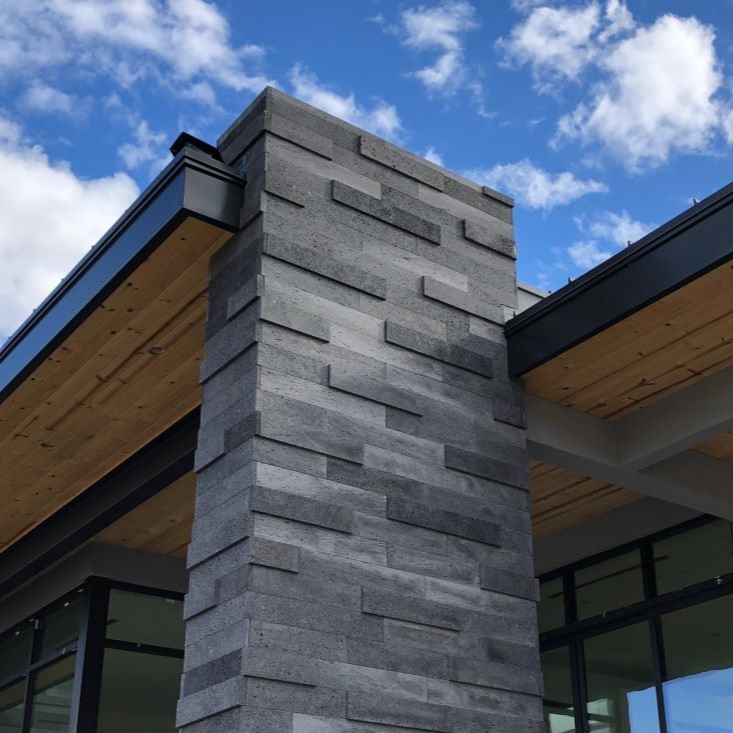

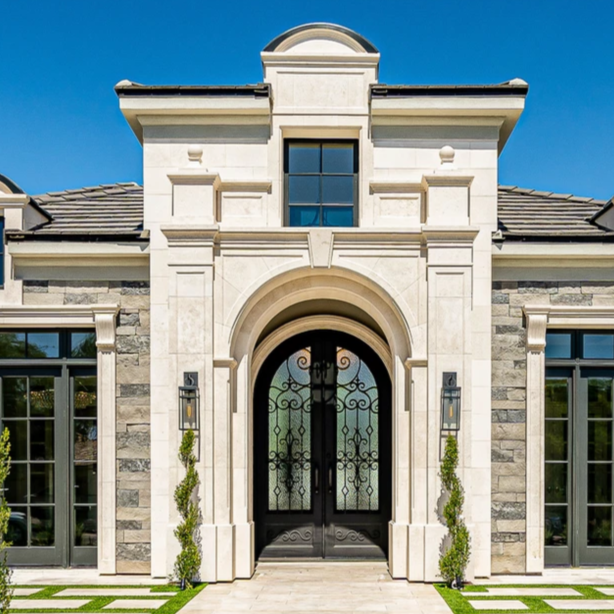


You’ve dutifully poured over Pinterest inspiration pictures, driven your community photographing your neighbors’ doors when they weren’t looking and worked through the nitty gritty details of pricing, lead times and warranties with your salesperson . . . so what’s next? Your CAD Drawing! Super exciting, right?!?! Well, not always . . . many of our clients find their CAD Drawing downright overwhelming, after all these technical drawings are just that . . . technical. Not to worry, a quick stroll through a CAD Drawing together will give you the information you need to feel confident in approving your custom door design.
While these little drawings are jam-packed with technical information much of the information included is specifically intended for our designers and artisans creating your door, which means there’s no need for you to stress over each and every detail of the CAD Drawing in order to get the DOOR OR YOUR DREAMS. To assist with your review process, we’ve provided short descriptions of our features and options below, highlighting the areas you should pay the most attention to in reviewing and approving your drawing. Let’s dive in!
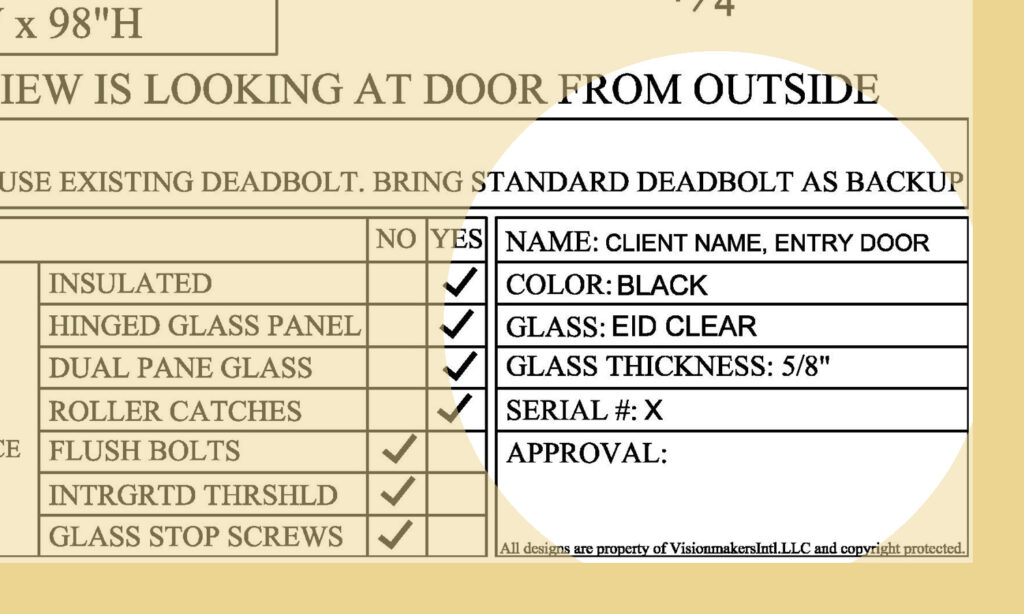
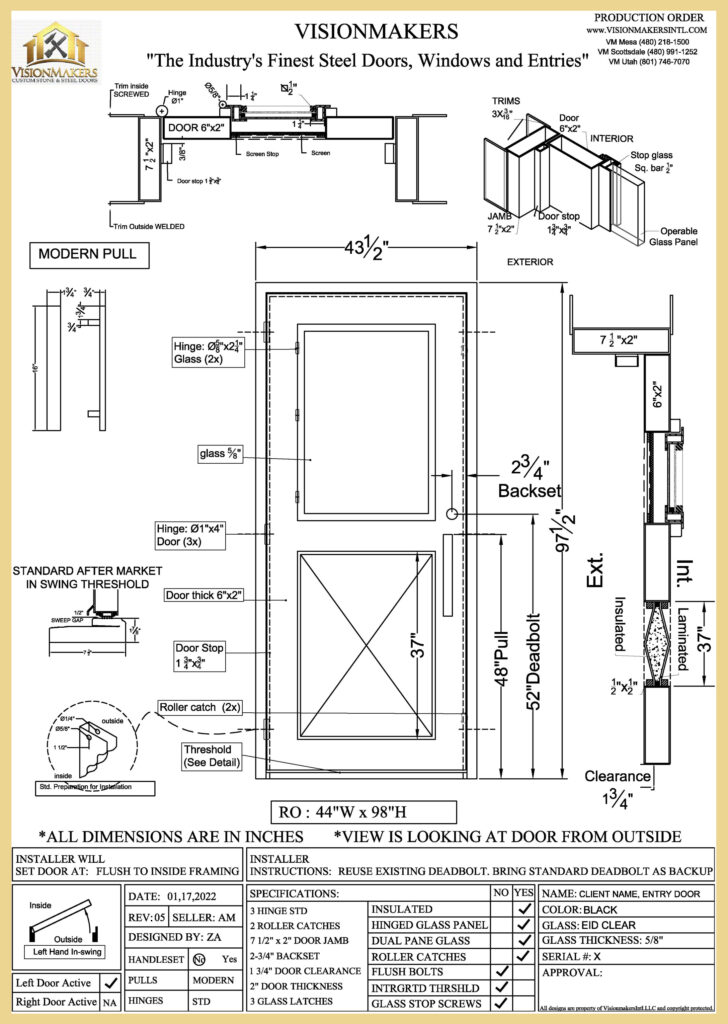
LOWER RIGHT CORNER
NAME: Project name or client name. If you have more than one door in your project scope make sure they are labeled correctly here.
COLOR: Our standard finish options include Black, Dark ORB (Oil Rubbed Bronze), Medium ORB, Heavy ORB and Pewter. If you requested a custom color this is where you will want to see that color noted.
GLASS: Our standard glass options include Clear Low-E, Acid Etch, Rain, Water, Aquatex and Glue Chip. If you decided to go with a specialty glass this is where you will want to see that glass noted.
GLASS THICKNESS: Exterior doors will have either 7/8″ or 5/8″ thick glass. Interior doors will have either 3/8″ or 1/4″ thick glass. Glass thickness is also determined by the design intent.
SERIAL #: For office and factory use.
APPROVAL: This where you will place your John Hancock after going through the entire drawing and approving of all the details in order to place your door into production.
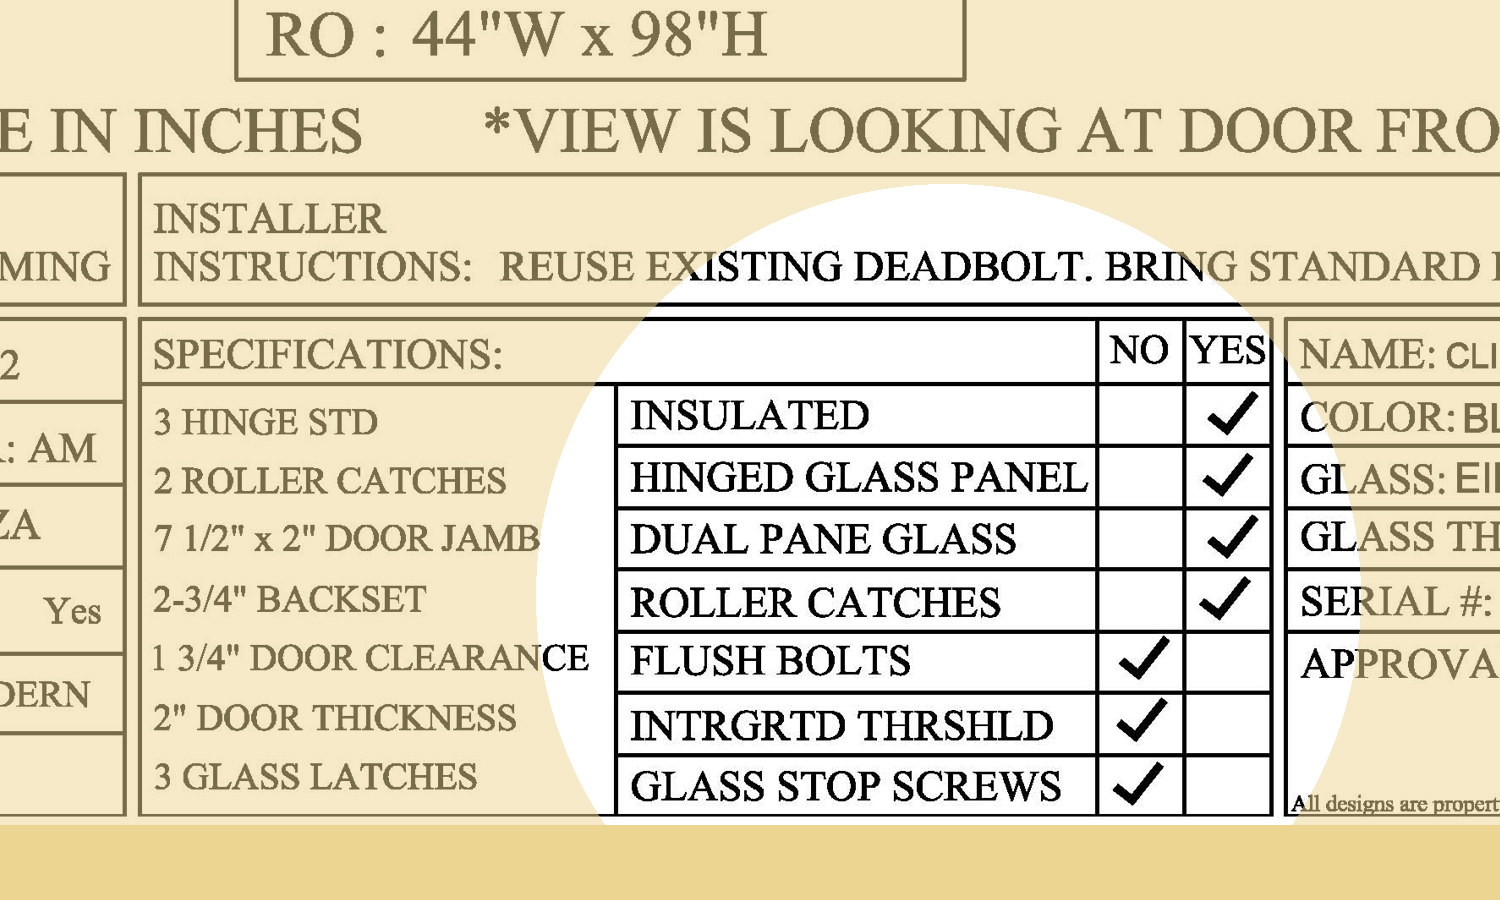
LOWER CENTER SECTION
INSULATED: Exterior doors connecting the interior of the home to exterior elements are insulated. Interior doors, courtyard towers and gates are not insulated.
HINGED GLASS PANEL: Our hinged glass option is typically found in doors with iron work covering the glass, the hinge allows for easier cleaning of the glass.
DUAL PANE GLASS: Exterior doors will have dual pane glass. Interior doors will have single pane glass.
ROLLER CATCHES: These are spring loaded roller hardware that catches the door and holds it closed. Exterior and interior doors will have roller catches, barn doors will not.
FLUSH BOLTS: Flush bolts are used to secure the inactive leaf of a pair of doors. Double doors will have flush bolts, single doors will not.
INTEGRATED THRESHOLD: An integrated threshold is built into the frame of the door while a standard threshold is an independent piece installed with the door. Pivot hinged doors will always have an integrated threshold, beyond that the threshold is determined by the design the door design as well as the space receiving the door.
GLASS STOP SCREWS: This option affects how glass will be installed in the door and is determined by the design intent.
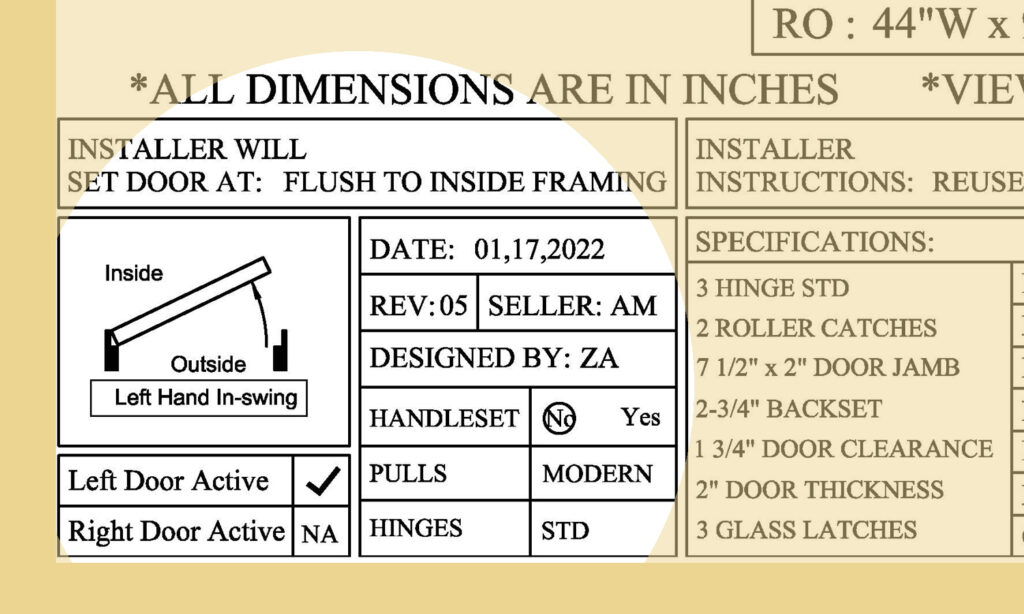
LOWER LEFT CORNER
HANDLESET: Our doors come standard with a deadbolt and pull. If you ordered a specialty handle set such as a lever or knob from Emtek, this should be marked yes along with the model indicated in the center of the drawing.
PULLS: Our standard pull options include Modern, Modern Round, Modern Bend, Modern Twist, Gothic, Square, Round Castle and Thick Twist. Confirm this is the style pull you selected, front and side view details of your pull can be found at the center of the drawing.
HINGES: Our doors are constructed with either a standard or a pivot hinge option. If you selected a pivot hinge this box should indicate that, you will also find a dashed line on the main door drawing illustrating the location of your pivot hinge with in the frame.
SWING: This detail illustrates which way the door opens and swings into the space. Our options are left hand out, right hand out, left hand in and right hand in.
ACTIVE SIDE: The active door is specified when building double doors. The active door is the door used to open and close the unit. The non active door can be secured in place or released to open with the flush bolts.
CENTER OF THE DRAWING
DOOR SIZE: The overall dimensions of your door. The width will be located at the top of your door with the height on the side.
RO: The Rough Opening refers to the framed opening of your door. If you are working with a contractor or builder this is the magic number they will need to correctly frame your opening before we arrive to install your door.
OVERALL DOOR DESIGN: Finally the part you’ve been waiting for . . . the Door Design. Go ahead . . . give your door a good hard look! Keeping in mind that our CAD drawings are drafted looking at the door from the outside, consider the design details, scale, proportion, composition and function. Does it feel good to you? If we nailed every last detail, go ahead sign and return your drawing for us to begin building your custom door.
If it’s not perfect just yet, no problem! This is a creative process, which means it might take a round (or even two) of edits to get your door design just right. Connect with your salesperson to go through your questions, concerns and desired edits. After all, this is the time to make any and all changes to your custom door because once a drawing is approved and placed into production the design is locked. So don’t be shy, it’s often the final tweaks to the CAD drawing that transforms the design from a door you really like . . . to one you ABSOLUTELY LOVE!