


Tools Needed
- Phillips screwdriver or drill if needed
- Level
- Ladder
- If applicable: Utility knife, drill bits
Instructions
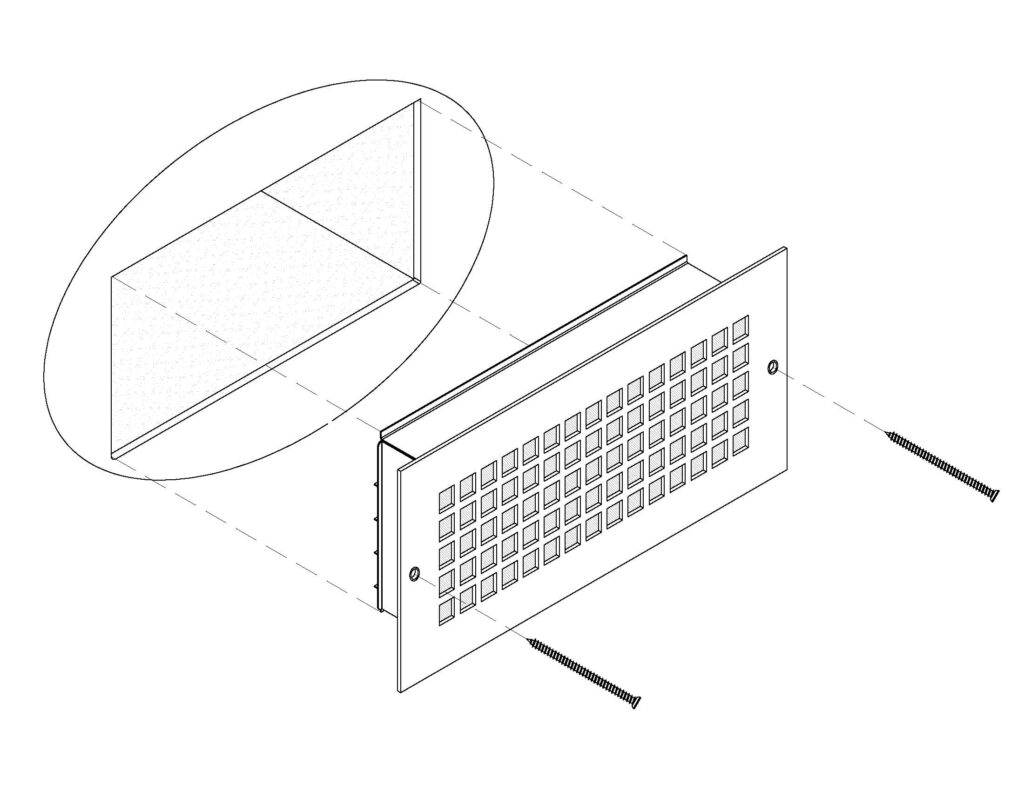
STEP 1: Unscrew and remove your existing vent cover (if applicable). You may have to use a utility knife to cut through old paint around the perimeter.
STEP 2: Locate your matching screws and screwdriver or drill. Now, slide the new vent into the opening until the vent face is flush to your wall or ceiling surface. While holding the vent in place, screw it in using the provided screws. A level is helpful here to ensure the vent is installed straight.
TIP 1: If your duct opening is slightly skewed, you can often bend or spread the aluminum walls to be able to slide the vent’s flange inside. Other times your drywall has been cut too tight and is bending the duct. Trim back the drywall with a utility knife or exert some force to slightly expand or bend the metal duct opening.
TIP 2: Should your screw run into a wood stud, you will need to pre-drill a hole for your screw to avoid it from stripping or breaking.
STEP 3: Your last step is to adjust the vent’s damper for the proper airflow. This is done by simply using a flathead screwdriver. Insert it into the damper’s adjustment lever, and twist it to the desired amount of open or closed setting.
Additional Tips
- If your vent face is not sitting flush to the wall, the flange may be obstructed by drywall or the duct. Make sure to slightly bend the duct or cut away any intruding drywall with a utility knife, then re-install.
- Extremely large vents may require drywall anchors to secure safely in place.
- If you have a piece of intruding trim such as a baseboard, you may need to cut that protrusion slightly.